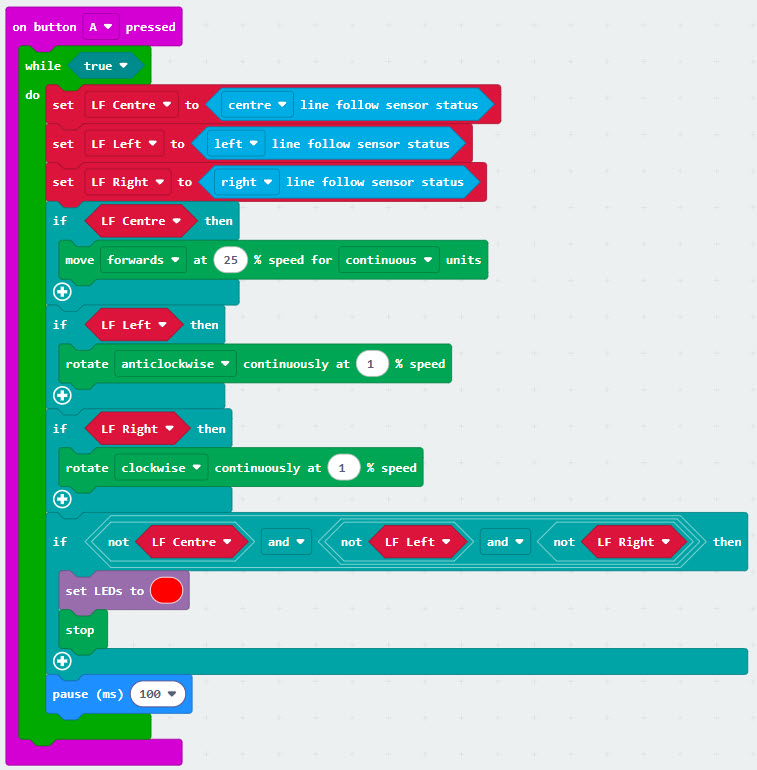
A popular classroom activity for Mai-Z the MouseBot is line following. My preference for creating the line is using a wide, felt black marker for these reasons:
Fast setup time – grab the marker and paper
Students can draw custom tracks and mazes in minutes
Easy to create curves, loops, intersections, and challenge paths
Encourages creativity and rapid experimentation
Very low cost for large classroom use
Works well on butcher paper, poster board, cardboard, and whiteboards
Thick marker lines are easy for two of three of the Mai-Z’s robot sensors to detect
Portable and lightweight for workshops and STEM events
Ideal for temporary activities and quick lesson transitions
Helps students connect robotics behavior directly to visual track design
There’s another choice if you don’t like the wide markers. Electrical tape works best when you want a cleaner, reusable course for repeated demonstrations or competitions. But it must have a dull finish so that it absorbs the infrared light instead of reflect it (which is what a shiny. Some educators like to print out tracks, too.
Whatever your preference is for creating the line, I’ve provided a code example below that you can use to test your plan. I didn’t post the .hex file so that students can create